EMDR Multi Pro Help V1.8
|
|
Initial Setup Actions
The "Task-bar" in Windows and the "Dock" in OSX can prevent a window from fully filling the screen.
Windows (Example is XP based)
- Move the cursor to the bottom of the screen
- Right click on the Task Bar (bottom menu bar)
- Click on "Properties"
- "Tick" auto-hide the task bar
- "Un-tick" "Keep the task bar on top of other windows"
- Click on "OK"
In Windows XP it may be advantageous to set "Monitor hardware acceleration" to maximum. NB With some sound cards / Windows versions this is not possible - hardware acceleration is set automatically.
- Start / Control Panel / Display
- Settings / Advanced / Troubleshoot
Mac
- Select system preferences (Apple [Top left] / System Preferences)
- Click on "Dock"
- "Tick" Automatically hide and show the Dock"
- Close system preferences
On a Mac to force the dock to hide:
- Press Command-Option-D
For all systems it may also be advantageous to extend the time before the activation of your screen-saver or to disable your screen-saver entirely if you undertake long blocks of processing.
In Macs in particular the default frequency that the keyboard is queried to determine of a key has been pressed is often set to a low level ie the keyboard is queried infrequently. This can be changed via the "Keyboard" section in "System Preferences". Set the "Key repeat rate" to "Fast" and the "Delay until repeat" to "Short". When changing the speed in Macs hold the key down rather than tapping the key.
On all systems close all other programs so that EMDR Multi Pro / Home is the only program running. On Macs it may be advantageous to stop AirPort from running (ie wireless web access). Performance will be affected when downloads eg of updates are taking place in the background.
If using a laptop ensure that you are plugged into mains power rather than using battery power.
Headphones and bilateral beep sounds
Some headphones contain stereo splitting circuits that will effectively prevent bilateral sounds from being generated. A stereo splitter circuit forces sound to both ear pieces and changes the volume levels between the two sides. As a result bilateral sounds will be heard in both ears. Also, some sound cards activate a "Stereo Virtualisation" filter when they detect that headphones are plugged in. This filter has the same effect as a stereo splitter circuit.
If affected you should use a different type of headset and or disable "Stereo Virtualisation". Click here for details...
Additionally on some systems with some headsets it may not be possible to bilaterally pan externally sourced mono beeps. This is very rare.
Setting the best default speed for your system
Close all other programs other than EMDR Multi Pro.
Alter the speed / smoothness scroll-bars until you find a combination of speed and smoothness settings that generate smooth tracking on your system. NB Image size also affects the speed / smoothness - a larger image will track more slowly and potentially with more juddering, a smaller image may track faster and smoother.
 Start with the speed and smoothness scroll-bars at maximum.
![]() Click on the "Treatment Mode" button to test.
Click on the "Treatment Mode" button to test.
![]() If "Fast Style" is selected: Reduce the smoothness until the tracking speed is slightly too fast, then reduce the speed until the speed is slow enough for normal use. (On this system the speed was 50% and smoothness was 30% with an image size of 70).
If "Fast Style" is selected: Reduce the smoothness until the tracking speed is slightly too fast, then reduce the speed until the speed is slow enough for normal use. (On this system the speed was 50% and smoothness was 30% with an image size of 70).
If "Smooth Style" is selected: Just reduce or increase the speed until the desired speed is reached. (The software controls smoothness automatically).
When done click on "File" at the top of settings window then "Save as default settings" then click "Yes" to overwrite. The currently selected speed / smoothness / ... settings will be used when you next open the program. The program will close once the settings have been saved.
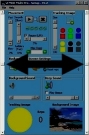
The Settings Window
 Top Menu Bar
File
Save as default settings - save the current settings as the default settings
Get default settings - resets all current settings are returns settings to their defaults
Save client settings - prompts for a filename and saves all current settings to file (Saves to /User/filename-specified.emdr)
Open saved client settings - allows the user to read a stored client settings file
Exit - close the application
Help
Website - Displays the Neuro Innovations Website
Support - Displays the Neuro Innovations support page
Keyboard shortcuts - Displays the keyboard shortcuts for the processing window
Help - Displays this page
Unlock - Displays the unlocking / registration window
Licence - Displays the Neuro Innovations standard EULA
About - Displays product name / version and user's system reference
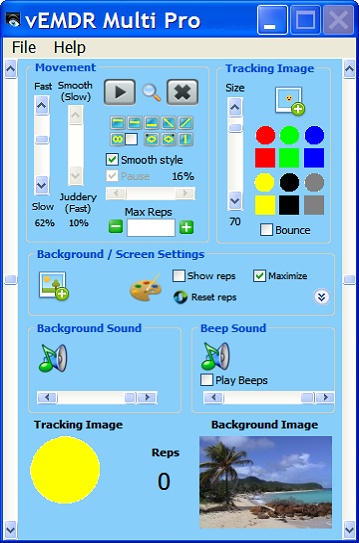
Graphical User Interface
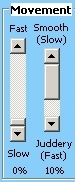
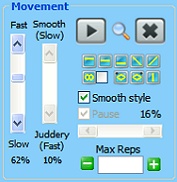 Movement Settings
 Left vertical scrollbar
This scrollbar represents the left hand side of the processing window.
The tracking motion starts at the left hand side from the point selected.
Right vertical scrollbar
This scrollbar represents the right hand side of the processing window.
The tracking motion ends at the right hand side at the point selected.
Scrollbar: Speed
Tracking speed - move upwards to track more rapidly.
Scrollbar: Smoothness
Note: Disabled when "Smooth Style" tracking is selected and in XP / Mac mode.
The "Smooth/Juddery" scrollbar determines how smooth the tracking movement is and applies when the "Fast Style" tracking is selected.
With the smoothness set to maximum (scrollbar pushed upwards) tracking speed may be slow or uneven on some systems. With the smoothness set to minimum (scrollbar pushed downwards) the tracking image may begin to judder and even fragment.
This is because different screens and graphics cards have different capabilities. The smoothness scrollbar allows you to adjust the software to match the capabilities of your system.
Adjust with the speed slider as high as possible, then move the smoothness scrollbar downwards until movement is fast enough without being too juddery.
Note: Speed also increases when the tracking image is made smaller.
 Checkbox: Pause
Note: This facility applies to the "Fast" tracking style only. (When the "Smooth" tracking style is selected the program controls the level right / left pause automatically and the manual pause facilities are disabled).
Check the checkbox to force a pause at the left and right hand sides.
Use the pause scrollbar to set the duration of the pause. As you do so the duration of the pause as a percentage is displayed.
 Icon Button: Start Tracking (Treatment Mode)
TREATMENT MODE
Start treatment mode - press to start the tracking motion.
The setup window will autohide.
 Icon Button: Preview Tracking (Preview Mode)
PREVIEW MODE
In this mode the tracking motion starts but the settings window remains present.
Tracking continues underneath the settings window.
Note: May not function as intended on some systems.
 Icon Button: Stop Tracking
STOP
Stops all movement and sound.
 Icon Buttons: Tracking Motion Selection
Visual tracking mode. Track at the top of the processing window.
Auditory tracking mode. Track in the middle of the processing window.
Kinesthetic tracking mode. Track at the bottom of the processing window.
Top left to bottom right tracking pattern.
Bottom left to top right tracking pattern.
Figure of eight tracking pattern.
- Double-click again reverse the tracking direction
- Tick the check-box to compact the tracking motion horizontally
Elliptical / Oval tracking pattern - tracks anti-clockwise.
Elliptical / Oval tracking pattern - tracks clockwise
Vertical tracking pattern - tracks up and down
Checkbox: Smooth Style / Fast Style
When this checkbox is checked the software generates a smooth tracking style that is slows down towards the left and right hand sides. When unchecked the tracking style maintains the same speed throughout the tracking cycle.
Note: When the smooth style is selected the "Smoothness / Judderyness" vertical scrollbar is disabled on Macs.
 Max Reps Value
Maximum number of reps (loops). Clear to loop forever.
Once the maximum number of reps has been hit the tracking motion will be stopped, sound will be stopped and the setup window will be displayed if hidden.
|
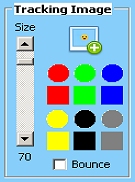 Tracking Image Settings
 Scrollbar: Image Size
Tracking image size. Move upwards to increase the image size and downwards to reduce the image size.
NB Larger images move more slowly and very large images may not have sufficient room to move sufficiently if the screen size is small.
|
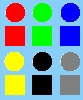 Icon Buttons: Circular and Square Red / Green / Blue / Yellow / Black Gray Preset Tracking Images
Standard preset tracking image. (6 colors, 2 shapes).
Click on the desired shape / colour to select.
Checkbox: Bounce
Displays the tracking image only when the image is at the left and right hand sides of the screen. This setting applies to all modes and tracking selections apart from vertical. If "vertical" is selected and "Bounce" is "checked then the bounce checkbox will be unchecked.
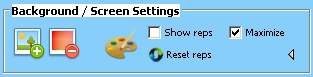 Background / Screen Settings
Icon Button: Add Background Image
Add background image for the tracking image to move over.
Transparent gif images and png icons will display without a background.
NB Not all image types eg bmp / jpg support a transparent background.
Icon Button: Clear Background Image
Clear current background image.
Icon Button: Background Color
Change background color (displayed when a background image is not being displayed).
Checkbox: Show Reps When Tracking
If possible display the rep counter on the processing window at the top left hand side.
NB This may not be possible on all systems / system types.
Checkbox: Fullscreen
Maximize the processing window. Un-check if you are using dual display monitors and you wish to host the processing window on the second monitor. The easier alternative is to clone the monitors so what you see is what your patient sees.
Icon Button: Reset Rep Counter
Reset the rep counter to 0.
 Background Sound Settings
Icon Button: New Background Audio
Add background audio and start playing in a loop.
Once a sound file has been selected clear / pause & rewind and play buttons will appear.
Any sound file supported by your platform can be selected and a number of file filters are provided.
NB Sound is stopped when moving from treatment mode to setup mode.
Icon Button: Clear Background Audio
Clears the currently selected background audio sound.
If the sound is playing it will be stopped prior to being cleared.
Icon Button: Pause and Rewind Background Audio
Pauses the currently selected background audio and rewinds to the start.
Icon Button: Play Background Audio
Play the currently selected background audio file in a loop.
Scrollbar: Background Audio Volume
Background Audio Volume: .
Select 0 (far left) to mute, select 100 (far right) to play at the current volume set by your system.
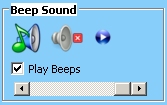 Beep Sound Settings
Icon Button: Add Beep Audio
Add beep sound from the selection or provide your own.
Beeps are played when the tracking image hits the far left and right hand sides of the processing window.
If a beep is selected the "Play Beeps" check box is checked.
If providing your own sound files they should be no longer than 2 seconds in duration. Any sound file supported by your platform can be selected and a number of file filters are provided.
Icon Button: Clear Beep Audio
Clear the currently selected beep sound.
The "Play beeps" check box is automatically un-checked.
Icon Button: Preview Play Beep Audio
Play currently selected beep once.
Checkbox: Enable Playing of Beep Audio
If a beep has been selected allows the beep to be played when the tracking image hits the left or right hand sides of the processing window.
Scrollbar: Beep Audio Volume
Beep Volume: .
Select 0 (far left) to mute, select 100 (far right) to play at the current volume set by your system.
 Tracking Image Preview / Rep Counter / Background Image Preview
Icon Button: Currently Selected Tracking Image
A preview of the currently selected tracking image at the actual size of the image on the processing window.
Current Value for Rep Counter
The current number of reps (loops).
Icon Button: Current Background Image
The currently selected background image.
A beach image is displayed if a background image is not currently present.
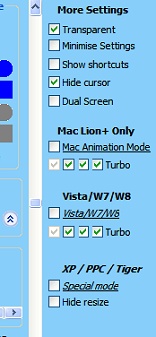 More Settings
More settings are available by clicking on the small triangle to the right of the "Maximise" check-box.
Checkbox: Enable Transparency
Transparent - Enables transparency for images such as gif / png images.
Checkbox: Minimise Settings
Minimise Settings:
Used when dual monitors are being used and not using clone mode..
Forces the settings window to remain visible when tracking is in progress.
Checkbox: Show Shortcuts
Show Shortcuts:
Displays the list of the processing window's keyboard shortcuts..
NB Shortcuts may not be accessible on some systems.
Checkbox: Hide Cursor
Hide cursor:
Hides the cursor when in processing mode.
Checkbox: Dual screen
Unchecks the "Show Cursor" / "Minimise Settings" check-boxes
Mac Lion+ Mode
These settings apply to the Mac Lion+ mode only.
Checkbox: Mac animation mode
Tick to place the app into Mac Lion+ mode. App restart required when changed.
Turbo check-boxes 1-4: in most situations all 4 boxes should be checked. If power needs to be reduced to reduce the speed one or more boxes can be unchecked.
Checkbox: Hide Resize Handle (Mac)
Hide resize handle: (Mac only).
Masks the bottom right risize handle added to windows by Mac OSX.
NB To enable tick the checkbox and the save the current settings as default settings, then close and reopen this product.
Vista W7/W8 Mode
These settings apply to the Vista W7/W8 mode only.
Checkbox: Vista W7 / W8 mode
Tick to place the app into Vista W7/W8 mode. App restart required when changed.
Turbo check-boxes 1-4: in most situations all 4 boxes should be checked. If power needs to be reduced to reduce the speed one or more boxes can be unchecked.
XP / PPC / Tiger Mode
These settings apply to the XP / PPC / Tiger mode only.
Checkbox: Special mode
Tick to place the app into XP / PPC / Tiger mode. App restart required when changed.
NB It is possible that this mode may function on any system (Mac or PC, any version of Windows / OSX). On more modern systems however there may distortion or tracking speed issues.
NB When changing between tracking engines ie Mac / Windows / Special an app restart will be required.
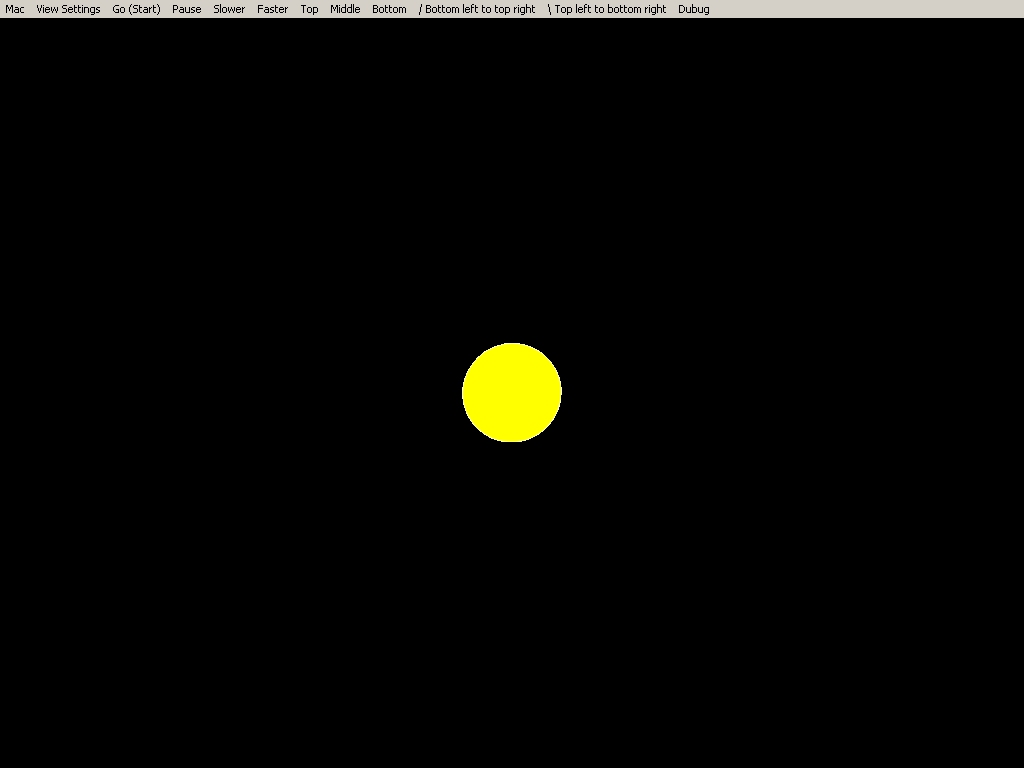
The Processing (Treatment) Window
Top Menu Bar
Movement: Top / Middle / Bottom / Bottom Left to Top Right / Top Left to Bottom Right
Tracking Window Keyboard Shortcuts
- F - Track faster
- S - Track slower
- Escape - Return to Settings Mode
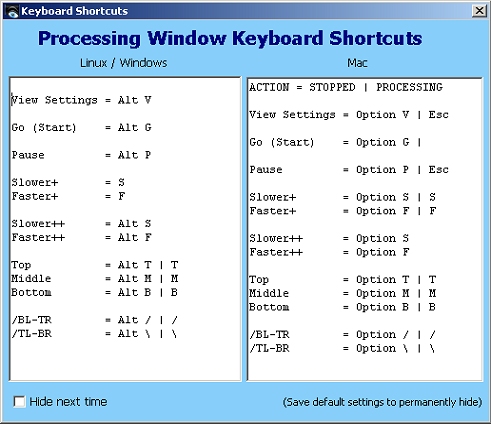 Full list of keyboard shortcuts - Linux / Windows:
- Stop = Esc
- Go (Start) = Alt G
- View Settings = Alt V
- Pause = Alt P
- Slower+ = S
- Faster+ = F
- Slower++ = Alt S
- Faster++ = Alt F
- Top = Alt T | T
- Middle = Alt M | M
- Bottom = Alt B | B
- /BL-TR = Alt / | /
- /TL-BR = Alt \ | \
- Fig 8 = 8
- Ellipse = E
- Vertical = V
Full list of keyboard shortcuts - Mac:
- View Settings / Stop = Esc
- Slower+ = S
- Faster+ = F
- Top = T
- Middle = M
- Bottom = B
- /BL-TR = /
- /TL-BR = \
Mouse / cursor control is not possible on Macs when processing. Keyboard shortcuts should be used.
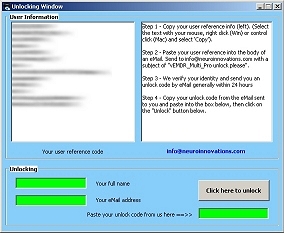 The Unlocking Window
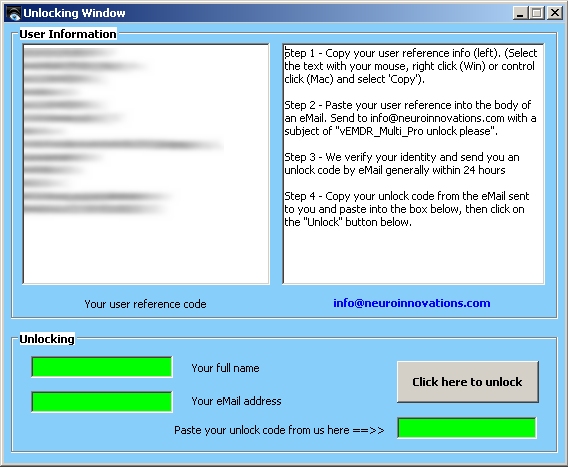
- Step 1 - Copy your user reference info (left).
- Step 2 - Paste your user reference into the body of an eMail. Send to neuroinnovations.com with a subject of "vEMDR_Multi unlock please".
- Windows: Press Control and C at the same time. Open an eMail then press Control and V at the same time to paste the user / system reference info into your eMail.
- Mac: Press Apple and C at the same time. Open an eMail then press Apple and V at the same time to paste the user / system reference info into your eMail.
- Step 3 - We verify your identity and send you an unlock code by eMail generally within 24 hours.
- Step 4 - Copy your unlock code from the eMail sent to you and paste into the box below, then click on the "Unlock" button below.
Copyright Neuro Innovations 1998-2014
Last Updated 25 April 2024 © www.neuroinnovations.com 1998-2023
|
|